1) SNJ AT HOME - Science & Nature

A Visit to Galena Creek Recreation Area Can Improve Your Mood and You Might Even Learn a Little About Nature Along the Way

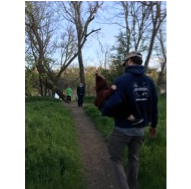
Galena Creek Recreation Area in Reno, Nevada, is one of Sierra Nevada Journeys’ field sites for Classrooms Unleashed and the Our Amazing Earth series, which is designed for fourth grade students. The rugged terrain of boulders, mountains and forest make it the ideal location for students to take the lessons they learned — the different types of weathering, the effects of erosion and how the two natural processes work together to shape the earth – for firsthand exploration.

Galena1.jpg

“Galena Creek, was a bit more isolated compared to some of our other field sites and it sits at a higher elevation so be prepared for weather conditions; there could still be snow on the ground in early spring,” says Vardan Kirakosyan, outdoor instructor with Sierra Nevada Journeys. “It is enjoyable to have a quiet experience at Galena Creek as it lets me use more of my senses to connect with the forest around me. I recommend reading the signs at every trailhead; it often gives you such important information and is always worth the time even though we are all excited to get started with our hike,” added Vardan.

Galena2.jpg

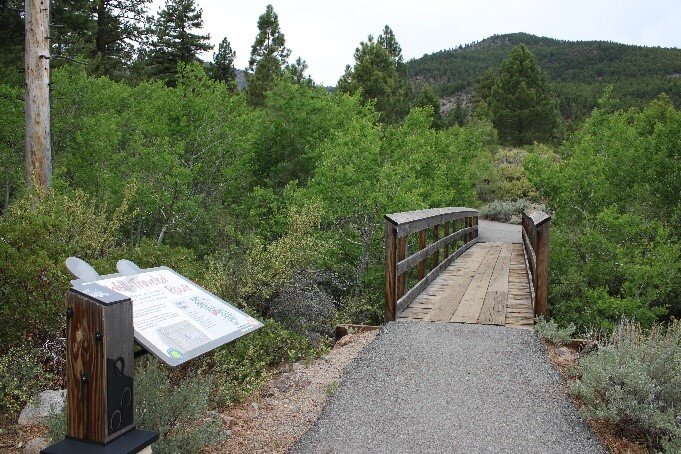
Vardan suggested starting with the Visitor Center Interpretive Trail; it is a small loop (0.4 miles) near the parking lot because it is one of the most accessible trails. “I wanted to share an experience that everyone can do! The trail starts with a short walk that then approaches a small bridge. This is a great place to take a moment and stop to make some observations. All animals need water to survive so take a moment to use all your senses to observe. After crossing the bridge, you are faced with a choice, left or right. I prefer going right and experiencing the loop in that direction, but you will see the same things either way,” says Vardan. 

Galena3.jpg

He added, “You might notice that some of the birds are different from the ones you normally see in town. That’s because you are at a higher elevation and different species prefer different environments in which to live. I also saw that the squirrels were different, much smaller, and spent their time in the bushes instead of the trees. It is a good idea to compare the animals and plants you see here to the ones you normally see in the city to practice your observation skills.”

Angie Anavisca-Valles, Community Outreach Specialist, Anthem Blue Cross and Blue Shield, knows a thing or two about stress, but more importantly, about ways to reduce stress.  

Galena4.jpg

“At Anthem, we work with a variety of populations in supporting their health and wellbeing. This past year has been particularly hard some families, both physically and mentally. When we learned about Sierra Nevada Journeys, we wanted to support their programs,” says Anavisca-Valles. “Stress affects everyone and some of the best ways to manage stress is observing your body’s response to stress such as difficulty sleeping, feeling agitated or lack of energy. Sometimes little steps like getting regular exercise, exploring outdoors and observing the wonders of nature can make a difference.”

Galena5.jpg

At the end of your hike at Galena Creek, try to think about the different plants and animals you observed. Make it a goal to remember some of the characteristics of a new animals that you saw and then go and find the name of it by searching the internet or books at the library. Sierra Nevada Journeys’ educators encourage bringing along a journal on your hikes to write down the colors and shape of birds, plants and other wildlife that you saw on your hike. 

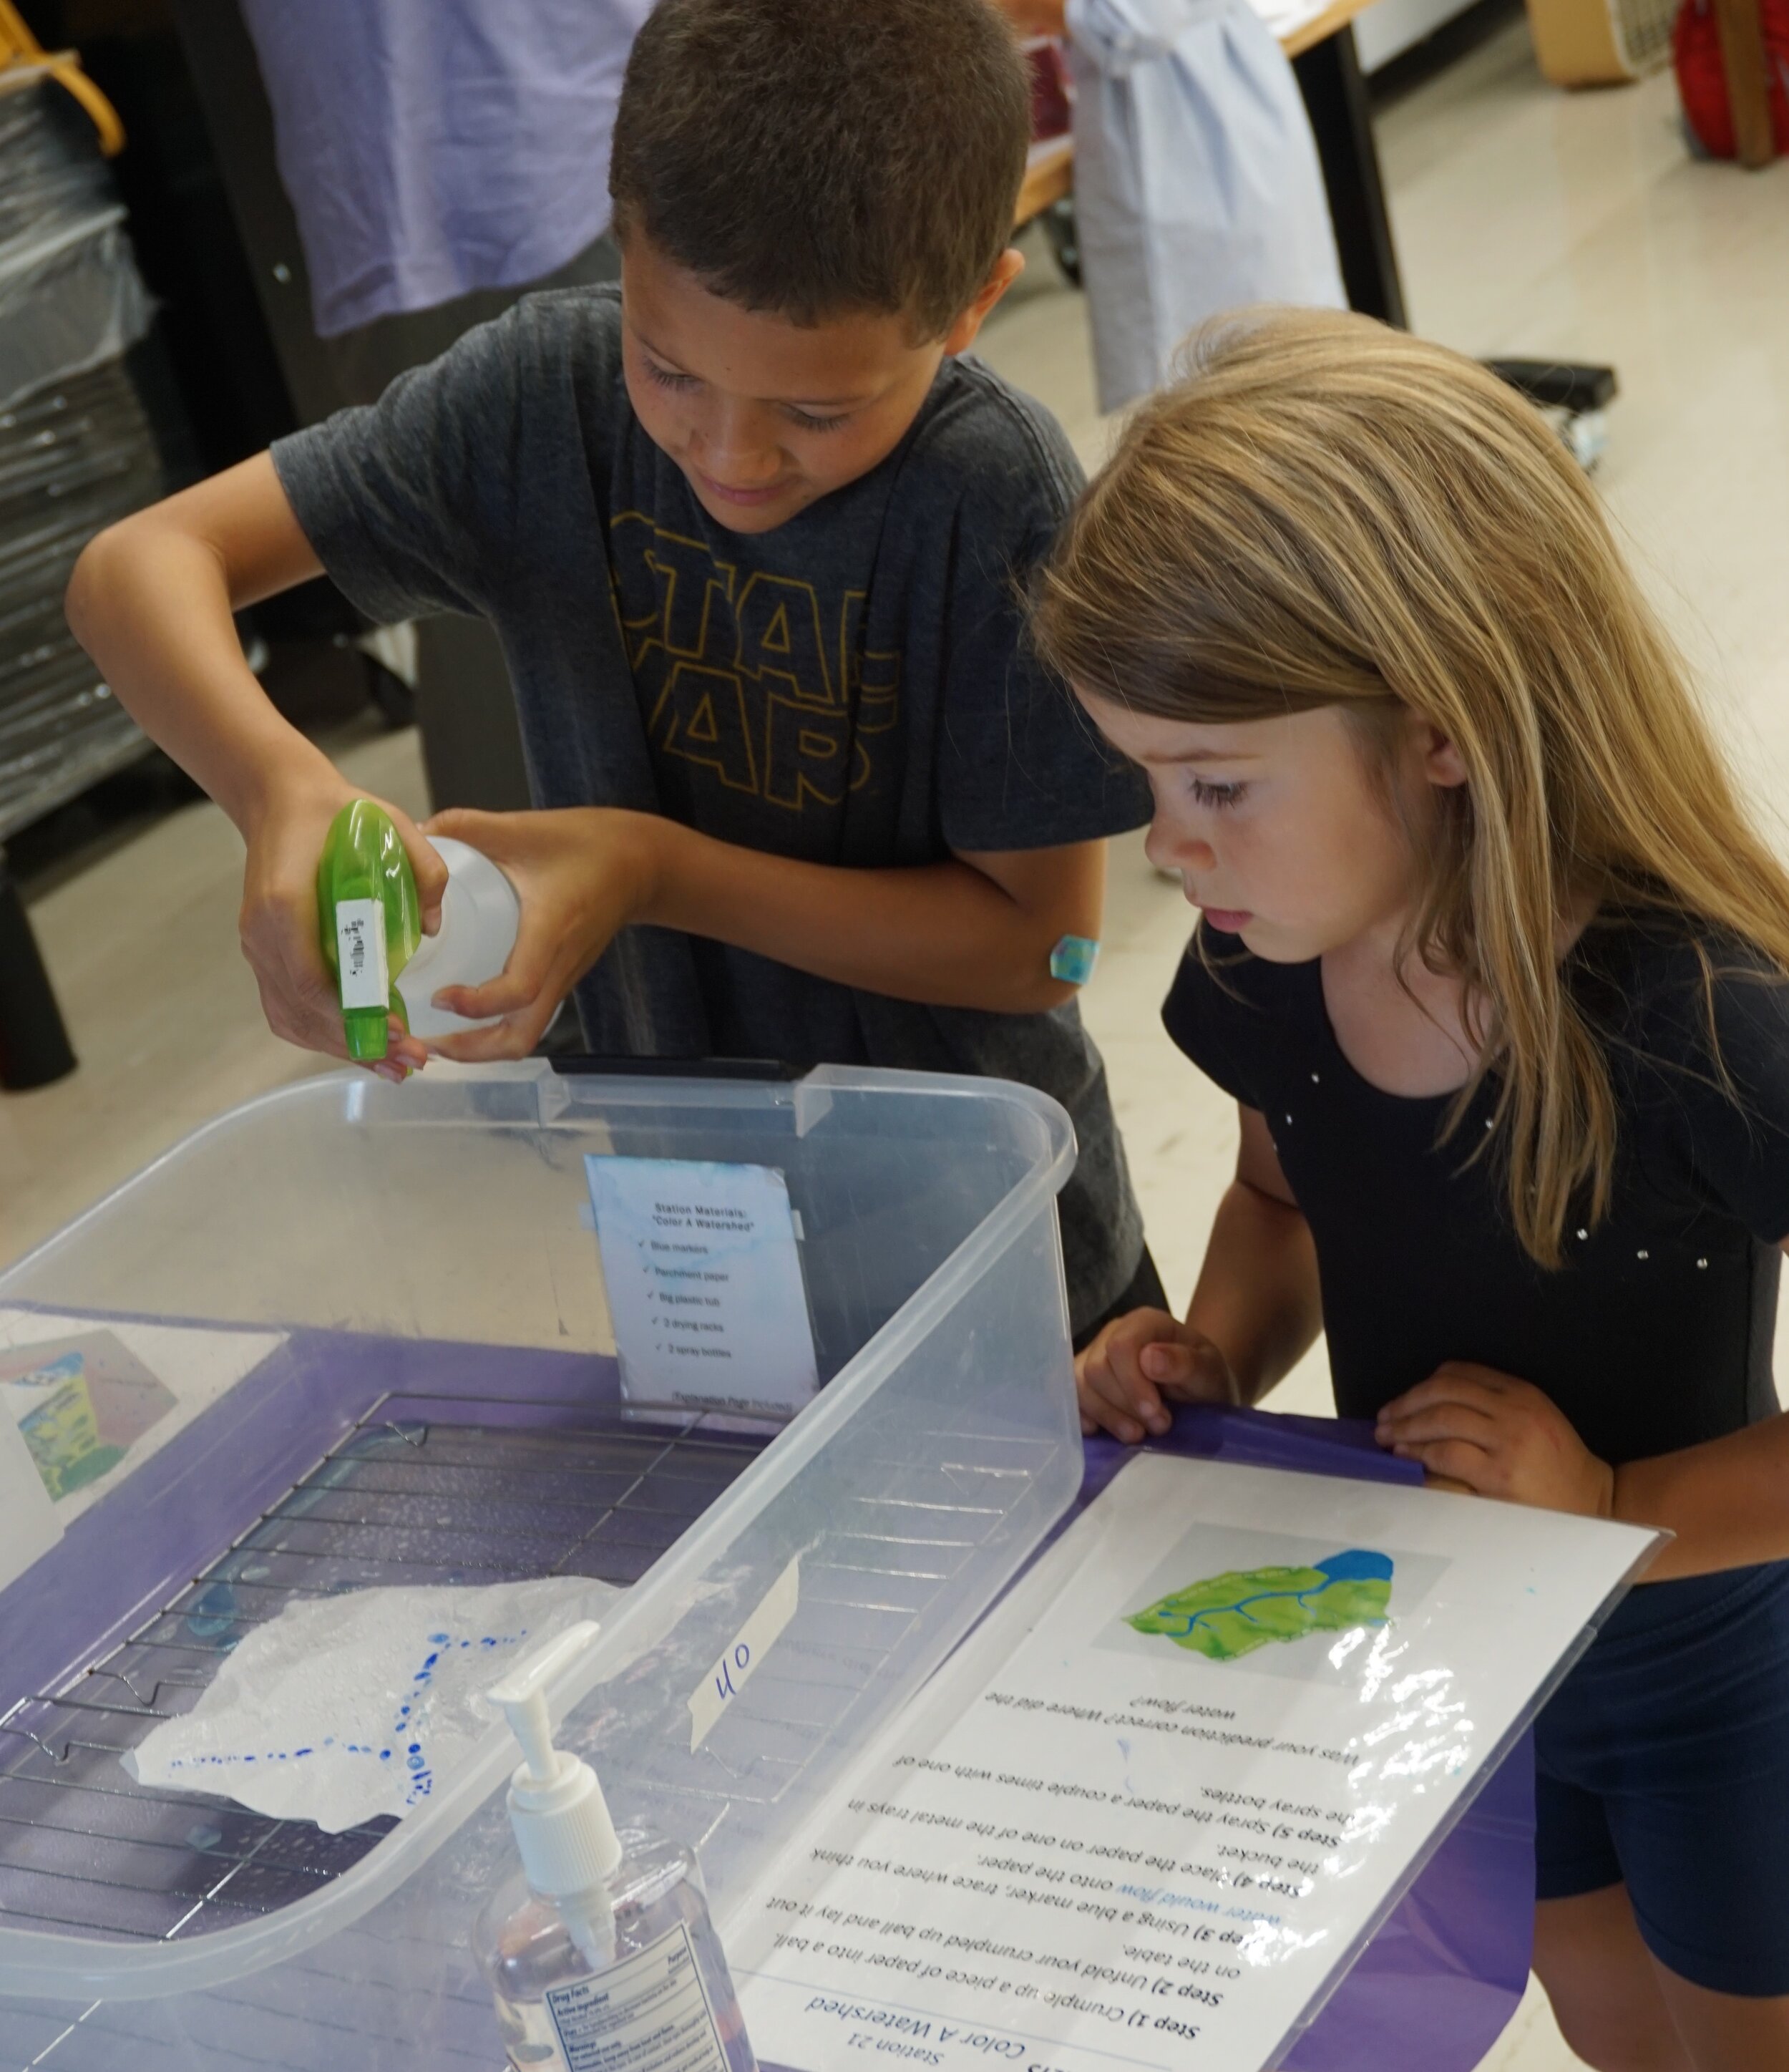
Nature journaling is one of the many tools used in Sierra Nevada Journeys’ style of teaching youth about environmental science. It starts with asking yourself a few basic thoughts when observing your surroundings: I notice, I wonder, and it reminds me of. From there, you can sketch pictures of what they see, write thoughts about your experiences and discoveries. Many find it as a meaningful way to learn and reduce stress.

We look forward to getting kids outside through student field trips. Contact Alyssa Wagner to book Classrooms Unleashed or a Family STEM Night program. 


Directions to Galena Creek Recreation Area:

Galena Creek Regional Area (south entrance) is located at 18250 Mt Rose Hwy, Reno, NV 89511. Learn more about Galena Creek. We encourage you to take a guided hike if you are not familiar with the area.   

Sierra Nevada Journeys' Classrooms Unleashed: Designed by credentialed teachers to be inquiry-driven, hands-on, student centered, and highly engaging. Our programs are aligned to Next Generation Science Standards (NGSS) and Common Core. Program fees are based on a sliding scale to meet the needs of all schools. Classrooms Unleashed programs include in-class lessons taught by Sierra Nevada Journeys educators and classroom teachers, an outdoor science field study at a local nature site and extension lessons for teachers for before and after our program. We also administer pre- and post-assessments for your students. We work with teachers to meet their classroom’s individual needs.

Family STEM Nights: They are a fantastic way to bring families together for an evening of fun. Experience the wonder of science and solve a variety of STEM challenges. Family STEM Nights are a great way to build community and engage students and their families.

The American River Parkway in Sacramento

Sarah4.jpg

I’ve always loved running as a way to stay active, but with the recent quarantine, more than ever, it’s been essential to my well-being.

My family is lucky to live a couple of miles from the American River Parkway. The Parkway includes more than 30 miles of hiking and equestrian trails, and many bike paths that stretch through 4,800-acres of natural resources in Sacramento County, California. It has more than a dozen access points including William B. Pond and River Bend Park which are two of our field day locations for Classrooms Unleashed.

Sarah2.png

Recently, we made it a point to drive to the river in the late afternoon or early evening each day. Sometimes we go for a walk as a family, exploring side trails and skipping rocks. Other days, we split up, so that our teenager can get some alone time, and I can get my run in while immersing myself into a podcast. I feel like I’m getting to know the river better — its plant and animal inhabitants and its visitors. Each spring, the redbud trees are in bloom, and the trails are lined with mugwort, vetch, and wild radish. It’s a beautiful place to visit and explore.

Sarah3.jpg

Is there a park or nature area where you live that you like to visit? If so, make a plan for an outing with your family this week. See how many different kinds of plants, trees, and wildlife you can find.

For maps and more detailed information about the Lower American River, visit the American River Parkway Foundation.

By Sarah Barnes, Sacramento Program Director


Mugwort

Mugwort

About the Vegetation

California mugwort ‘Artemisia douglasiana’ is a western North American species of aromatic herb in the sunflower family. Native Americans used it as a medicinal plant to relieve joint pain and headaches and to treat abrasions and rashes.

Eastern redbud ‘Cercis canadensis’ is a large deciduous shrub or small tree that has a cluster of tiny magenta budges and rosy pink flowers in early spring.

Redbud

Redbud

Vetch ‘Vivica’ is comprised of several species of plants in the pea family. Like other legumes, they add enriching nitrogen to the soil.

Wild radish ‘Raphanus sativus’ This exotic biennial (takes two years to complete its biological life cycle) of the Mustard Family is from southern Asia and can reach 3 feet in height and has a taproot somewhat like that of a radish with a distinctive radish odor and taste.

Vetch

Vetch

Wild radish

Wild radish


Photo Source: pixaby.com; vetch; mugwort; wild radish; and redbud.

Exploring Outdoors at Oxbow Nature Observation Area in Reno

There are many wonderful places to visit in the Reno/Sparks area where you can get outdoors and learn about nature. One of our favorite locations is the Oxbow Nature Observation Area, 3100 Dickerson Road, Reno, Nevada. Located just west of downtown Reno, Oxbow is one of our field sites for Classrooms Unleashed.

Oxbow1.jpg

In a 1-hour visit, you’ll be able to see some amazing wildlife and enjoy the fresh air safely and at a distance from other guests. It is a 0.8-mile trail loop within 22-acres of nature study area. Also, it’s good for all skill levels and accessible year-round.

Oxbow2.jpg

The park is open daily from 8 am until sundown; it is best to visit the park early in the day to avoid crowds. Please note there are no dogs allowed, and it is easy to access with plenty of on-site parking. As you start the trail, take note of the signs at the trailhead as they explain why the park is called Oxbow and some of the wildlife you might see.

Picnic area located at the end of the trail.

Picnic area located at the end of the trail.

As you travel down the trail, you will quickly come to a fork in the road that gives you three options: left toward the main trail; right toward a nice observation of the oxbow — a U-shaped curve in the Truckee River; or up, which leads you to an observation deck. We recommend that you start with the trail leading “up” as it gives you a bird’s eye view of the park. Speaking of birds, Oxbow is a wonderful place to go for bird observation. This year alone, 76 different species of birds have been observed at the park, making it a great destination to be introduced to animal observation. You might also see a wide variety of squirrels, snakes, and even deer.

Oxbow4.jpg

After the stop at the observation deck, you will pass by the Truckee River, a great place to make even more observations! The rest of the trail is linear and should be easy for you to navigate. You will know you have reached the end of the trail when you reach the picnic area (see photo), which is a great place to sit down, eat a snack, and enjoy the nature around you.

Take a moment at the picnic area to sit still for a moment and see what you can observe. On your way back to the parking area, make sure to stop by the small deck by the river as it boasts a beautiful and expansive view.  

100 Days of Birds

birdsphoto1.jpg

by Gabrielle Tribelli

Recently, a friend shared with me The 100 Day Project: an art project for individuals to explore creativity independently and generate new inspiration daily for 100 days. It’s a personal project, but also has a hugely supportive community behind it as people tag #The100DayProject to their daily creations online. So I thought I’d give it a try--what’s 100 days anyway? It can’t be that long …

I’m on day 22, and although I have a lot of time to go, I’ve made plenty of new findings and new friends. Bird friends!

I recently moved to Portola, California as a science instructor with Sierra Nevada Journeys at Grizzly Creek Ranch and I’ve become more aware of the incredible wildlife around me — both familiar and unfamiliar. I keep getting this feeling of, I want to know more; I need to know more. My fellow scientists are so intelligent — each bringing their own knowledge of flora (plants), fauna (animals), and natural science — that I am constantly inspired by them to gain more knowledge. One area of fauna, or animals, that I want to improve my knowledge of are birds. So I thought, why not use my love for painting and art to learn about the birds around me in a way that seems tangible for me. I decided my personal project is to watercolor one bird a day.

One morning my housemates and I awoke quietly--the loudest sound coming from the birch tree in the backyard, covered in yellow sprinkles. The yellow sprinkles were Townsend’s Warblers tickling our ears with their sweet-pitched songs. I painted my first bird that day. Twenty-two days have gone by since, and my bird-a-day project has opened my eyes wider to the sky, the trees, and the ground--searching both for birds that I know of already as well as those I’d like to discover. I think I hear a lot more these days too. My awareness of my natural surroundings has shown improvement in just two weeks.

One thing I’d love to share from my experience is that creativity is not an interest separate from the natural environment. I believe nature is the most creative pioneer of all, and I think everyone is capable of recycling its endless inspiration. Just listen to the birds’ songs.

birdsphoto3.jpg

- Gabrielle Tribelli is an outdoor science instructor with Sierra Nevada Journeys and when she is not teaching students, she is on her way to becoming a world-renown watercolor artist.


birdsphoto2.jpg
birdsphoto5.jpg
birdsphoto6.jpg

Read more about The 100 Day Project.

Bird Feeder Craft

Discipline: Nature Craft
Age Range:
all ages
Estimated Time: 15 minutes plus observation time
What You Need: one apple, birdseed, yarn or string; peanut butter; knife (with adult supervision); writing utensil; paper or printer (optional)

birdfeederphoto1.png

When the weather changes seasons from colder weather to the sunny skies of spring, many birds are building nests and preparing to have their young. Spend time together as a family creating this bird feeder together! When the bird feeder is finished you can hang it up outside and watch all the birds that visit your yard.

birdfeederphoto2.jpg

Instructions:

birdfeederphoto3.jpg
birdfeederphoto4.jpg
  1. With a parent’s help or permission, carefully use a knife to cut horizontal slices of an apple. They should be around a ½ inch thick.

  2. Use a pen or pencil to poke a hole near the top edge of each apple slice. Be sure not to poke too close to the edge, or the apple may break!

  3. Spread peanut butter to cover both sides of each apple slice. If you are having trouble getting the peanut butter to stick, consider dabbing the sides of the apple slice with a paper towel to dry it off before spreading the peanut butter.

  4. Cover the peanut butter apple in birdseed! Turning over both sides of the slice in a bowl of birdseed works great for this part of the activity.

  5. Cut off around 1ft of yarn and thread it through the hole you made in the top of your apple. If it is tricky to find your original hole, just poke a new one! Then, tie off the yarn with an overhand knot.

  6. Hang your bird feeder wherever you’d like! Trees and hooks near windows are great for observing birds from your own home.

  7. If your bird feeder runs out of seed, or falls off of its yarn, feel free to repeat this process and make as many bird feeders as you would like.

birdfeederphoto5.jpg

Spend some time each day watching your new bird feeder to see what types of birds visit. It might take a few days for the birds to find your feeder, so don’t worry if you don’t have any visits the first day.


birdfeederphoto6.jpg

Helpful Hints
If you’d like, you can complete this craft using a pinecone instead of apple slices! Tie a string around the top portion of the cone and then smear peanut butter all over the scales of the pinecone. Sprinkle seeds over the cone so that they stick to the peanut butter. Discuss which method might attract more birds and why.


Reflection Questions

  1. What do you notice about the birds that visit your feeder?

  2. Are they large? Small?

  3. Do they have any specific colors or patterns that are obvious?

Download the Making Observation Activity Page to record your findings or write them down in a notebook to help keep track of your observations


A Resource to Identify the Birds You Observe

This website is an excellent resource for identifying and learning about the birds that live near you


Meet a Tree (Video)

Discipline: Teambuilding, SEL, and Science & Nature
Age Range:
6+
Estimated Time: 30 minutes
What You Need: A partner, a bandana or blindfold, and an outdoor space with trees (alternatively, an indoor space and some rocks)

MeetaTreephoto.JPG

Practice your observational skills and connect with nature by meeting a tree! In this activity, partners will trade-off leading their partner to a tree blindfolded, “meeting” the tree using senses other than vision, and attempting to find their tree after removing their blindfold based on the observations they have made.

In this 5-minute video, you’ll also find an option to try this activity indoors using rocks. Afterwards, review and discuss the reflections questions below.

Reflection Questions:

  1. What senses or techniques did you use to find your tree or rock?

  2. What sense did you use the least?

  3. How can you use these skills to observe other things in the future?

How to Empty an Egg Without Cracking It

Discipline: Physical Science
Age Range:
8+ (adult supervision required)
Estimated Time: 10 minutes for activity; 60 minutes of drying time for the eggs
What You Need: a clean bowl; needle or thumbtack; toothpick or straightened paperclip; clear tape or masking tape; raw eggs; a towel or paper towels; soap and water

snjegg.png

Eggs are one of nature’s most ingenious inventions! Chicken eggshells are tough yet delicate, and surprisingly, can stay whole even if you pierce them with a needle! If you’ve ever wished your decorated eggs aren’t cracked open and turned into deviled eggs, here’s a fun way to make them last longer.

eggpic2.png

Instructions:

  1. Take out eggs from the refrigerator and let them sit until they are room temperature.

  2. Place a small piece of tape on the top (the pointy thick end) of the egg and the bottom (the fatter end) of the egg.

  3. Using a needle, poke a hole in the top of the egg through the tape. Hold the egg over the bowl to catch any of the liquid that drips out; do the same with the bottom of the egg. Wiggle the needle around in the egg to make the hole in the bottom bigger than the hole on the top.

  4. Take the paperclip or toothpick and stick it in the hole in the bottom of the egg. Gently swirl the end of the paperclip inside the egg, being careful not to damage the hole. You can also do this with a needle.

  5. Flip the egg over and blow air into the top of the egg, letting the contents of the egg drip into the bowl from the bottom hole. Rinse the eggshell with warm soapy water. Be sure to clean the inside and outside of the egg. Leave your egg pointy side-up to drip dry.

Once the egg is completely dry, you can start decorating!

Eggs are one of nature’s most ingenious inventions! Chicken eggshells are tough yet delicate, and surprisingly, can stay whole even if you pierce them with a needle! If you’ve ever wished your decorated eggs aren’t cracked open and turned into deviled eggs, here’s a fun way to make them last longer.


Helpful Hints
Egg shells can be very delicate. Putting a small amount of tape in the areas you intend on poking the holes in will lessen the chances of the egg cracking. When blowing into the top of the egg, if you notice none of the liquid is coming out the bottom of the egg, stop and try to break up the yolk inside the egg. If you blow too hard into the egg while nothing is coming out the pressure may make the egg explode.


Reflection Questions

  1. Why did you swirl the paperclip inside the egg?

  2. What do you think would happen if you had not broken down the egg yolk before attempting to blow it out of the shell?


Habitat Scavenger Hunt

Discipline: Life Science
Age Range:
7-12
Estimated Time: 20 minutes
What You Need: Habitat Scavenger Hunt activity sheet and an area outdoors

33497535711_41fb8d4ccd_k.jpg

Instructions: This activity focuses on finding habitats in your area.

Ask: “Do you know what a habitat is?” 

A Habitat is the nature home of a plant or animal. 

Ask: “Did you know there are four parts of a habitat. Can you guess what they are? What four things do all animals or plants, need to survive?”

The four parts of a habitat are food, water, shelter, and space.

Ask: “Do you think there could be habitats outside?”

Go outside with your Habitat Scavenger Hunt activity sheet and see if we can find all of the different parts of a habitat. Draw or write down all of the different examples you see in the appropriate box. You have a green box on your activity sheet for the examples of food that you find, a blue box for the examples of water, a red box for space, and a black box for shelter.

Remember to use your observation skills to help you find examples of habitats. What do you feel, see, hear, or smell? What animals could use the things you found?


New Words
Observation:
Making an observation means to learn and notice more about the world around us using our five senses.
Habitat: the four things an organism needs to survive; food, water, shelter, and space.  

Helpful Hints
Adults, if you are doing this activity with your child(ren), ask them the questions and have a discussion before looking for the parts of a habitat.

Color A Watershed and Predict Which Way the Water Will Flow

Discipline: Environmental Science and Watershed Science
Age Range: 7-12
Estimated Time: 10-20 minutes
What You Need: A blue washable marker; a sheet of parchment paper or aluminum foil (roughly 10” x 10”); and a spray bottle filled with water

watershed2.jpg

Instructions:

  1. Crumple your parchment paper or aluminum foil into a loose ball.

  2. Un-crumple your parchment paper or foil, but don’t smooth out all of the bumps and wrinkles. Lay the paper or foil in front of you on a table or tray. This wrinkly paper or foil represents an area of land. Notice the mountains and valleys.

  3. Imagine that it is about to rain on your area of land. Where do you think the water will flow? Where will it end up? Use your blue washable marker to trace where you think the water will go on your paper or foil.

  4. Let’s make it rain! Make sure your paper or foil is on a surface that can get a little wet (a table with a placemat or a cookie sheet are great options). Hold your spray bottle about 8-to-12 inches above your area of land. Spray the bottle a few times, creating an even mist over the whole area of land. Keep spraying until the water begins to flow.

  5. What did you notice when it rained on your area of land? Did the water go where you predicted it would?

watershed3.png
watershed1.jpg

You have just created a model of a watershed. A watershed is an area of land where all the water drains to a certain place. This even includes water that is underground! Because of gravity, water always flows downhill from high areas to low areas. Everything on that land is also inside the watershed. In fact, you live in a watershed too! All land is divided into watersheds, based on where the water that falls on that place flows and drains.

Click here to find out in which watershed region you live.


NGSS Standards: SEP: Developing & using models; CC: Systems & system models, Patterns, Energy & matter; DCI: ESS 2: Earth’s systems

Create Your Own Journal, Step-by-Step Instructions


Journal1.png

Discipline: Social Emotional Learning
Age Range: 9-12 (all ages with adult supervision)
Estimated Time:
20-30 minutes
What you need: Scissors, rectangular tissue box or any other cardboard box, printer paper, stapler OR needle and thread, sharpie, glue or tape (optional), plus any fun decorations (optional)

Journals are used by many people to pull thoughts, feelings, and ideas out of their heads and on to paper! These ideas can be expressed through words, drawings, pictures, and many other creative ways. Here is one way of constructing your very own journal, with limited resources, to use how you would like!


Instructions:

1. Cut out the bottom of the tissue box so you have a rectangular piece of cardboard.

Journal2.png

2. Fold the cardboard rectangle in half. You’ve created the cover of your new journal!

Journal3.png

3. Fold one piece of printer paper in half (hamburger style), and then in half again (hamburger style). This should create a small booklet of four pages.

journal4.png
Journal5.png

4. Use this folding method for at least four pieces of paper, then stack the booklets of paper together as shown. When stacking, be sure that the sides that open are with each other and closed sides are together as well.

Journal6.png
Journal7.png

5. Place the stacked booklets inside the cardboard “cover”. Align the open-sided pages up with the top edge of the cover. The closed sides of the pages should poke out from the bottom of your cover.

Journal8.png

6. Use scissors to cut off the edge of the pages that poke out the bottom of your cover. All of your pages should be able to open left to right, just like a book. Your journal is almost complete!

Journal9.png

7. Using a stapler, staple your journal together along the folded edge of the cardboard. Keep the stapler as close as possible to the fold so that you can maximize the size of your page. (Don’t have a stapler? No problem; you’ll find instructions in a second blog post for using a needle and thread.)

Journal11.png
Journal13.png

8. Your personal journal is done! Use whatever materials you’d like to decorate the cover — stickers, glitter, drawings, paint, etc.

Journal14.png
Journal15.png
Journal16.png

Translation Services USA