
Community Agreements - Friendship Bracelets
Discipline: Team Building and Community Agreements*
Age Range: 10+
Estimated Time: 20+ minutes
What you need: Scissors, string or thin yarn a binder clip or tape
*Community agreements are created as a way to establish a mutual understanding or make a set of expectations for all members of a community to abide by. They can be based on many things, such as how to support each community member and how to make everyone feel included. Please see What is a Community Agreement? blog post before starting this project.
Instructions:
1. Have each community member choose a string that will represent what they bring to the community, or what they would like to see in their community.

2. Cut strings long enough to fit as a bracelet and tie them together in an overhand knot at the end. Two feet should be a good length with which to start.

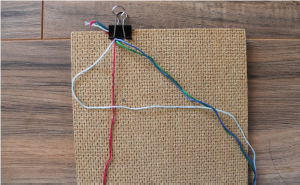
3. Clip or tape the strings onto something stable, such as a clipboard or chair.
4. Put the strings in the order that you want the colors to be in. The string furthest to the left will make the first row.
5. Take the first string (light blue in the picture below) and put it across on top of the second string (red) so that it looks like the number 4. Be sure to cross OVER the second string, not under it.
6. Wrap the tail end of the string (light blue end on the right) around the second string (red) and pull through the window you just made. Tighten the light blue string and move the loop up to the top of the bracelet while holding the second string (red) taught. Make a second loop by pulling the first string (light blue) around the second (red), the same way the first knot was tied.

7. Continue step 6 with each color of string, tying two loops around the strings to the right of the color you’re working on.
Example:
Light blue -> Red (2x), Green (2x), Dark blue (2x)
Red-> Green (2x), Dark blue (2x), Light Blue (2x)
Green-> Dark blue (2x), Light blue (2x), Red (2x)...etc.

8. Continue this process with the rest of the colors until the bracelet is long enough!

9. Wear the bracelet to remind you about what your community represents to you.
Helpful Hints: If you are having trouble following along with these instructions, there are many online videos that may be helpful! Here are a few:
DYI: 4 Easy Friendship Bracelets | Jada Draper
DIY Friendship Bracelets for Beginners | Craft Factory